Affichage des articles dont le libellé est couture. Afficher tous les articles

jeudi 3 mai 2012

DIY un Top Corail en dentelle! DIY Lace corail top !

J'ai vu ce débardeur chez HetM et j'ai failli craqué. Mais je me suis dit comme d'habitude que je pourrais créer un DIY.
I saw this lace top on HetM and I was about to buy it but then I told my self I would be able to make a DIY.

J'ai trouvé dans un vide grenier (l'une de mes activités favorites de printemps) un tissu de rideau dans des tons Corail et en Dentelle pour 1€ !! Ma cible était atteinte je pouvais créer ma réplique du désirée Top HetM.
Pour créer ce top vous avez besoin de :
-Un fond de robe beige ou blanc ou un débardeur
-Un morceau de tissu en dentelle ou un morceau de rideau;)
-Du fil assorti et une aiguille

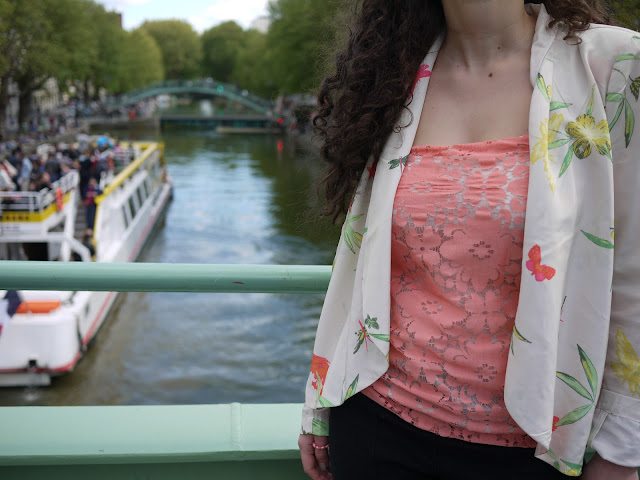
1. J'ai décousu l'ourlet du rideau qui était froncé en plus pour l'appliquer sur les manches et faire un joli détail.
2. J'ai cousu le tissu sur le débardeur uniquement sur le haut du top. Il n'est pas nécessaire qu'il soit cousu sur le bas
Et voila

I found in a garage sale (one of my favorite activity during spring time) a piece of curtain Corail and in Lace and for 1€!!! I was almost flying!! and I could make my own HetM top.
To make you lace corail top you will need :
-A top or something to put under a transparant dress
-A piece of lace fabric or a piece of curtain :)
-Needle and thread

1.  I  undo the hem of the curtain which was gathered to put it on the sleves to make a cute detail.
2. I sew the piece of lace only on the top no need to sew it at the bottom of the top.
And here you are!
Photo : Canal saint Martin un jour de 1er mai avec fond de péniche
Picture : Canal Saint Martin with a Péniche on the background 1st of may (labor day for us in France)

Bords du Canal Saint Martin
Edge of the Canal Saint Martin in Paris

Canard du Canal Saint-Martin


mardi 20 mars 2012

Sac du soir d'inspiration Alexis Mabille... Alexis Mabille inspiration purse...

Pour ceux qui me connaissent bien, vous savez sûrement que je suis fan de NOEUD!!! et surtout d'Alexis Mabille:) dont voici une petite sélection de sacs.
For whome who know me well, you know that I am absolutely mad one BOW!!! and above all of Alexis Mabille:) I have put above some selection of his purses.


Je n'ai pas de tuto détaillé car j'ai réalisé ce sac il y a longtemps, avant d'avoir mon blog en fait... mais je vais tenter une explication... n'hésitez pas si vous voulez plus de précisions.
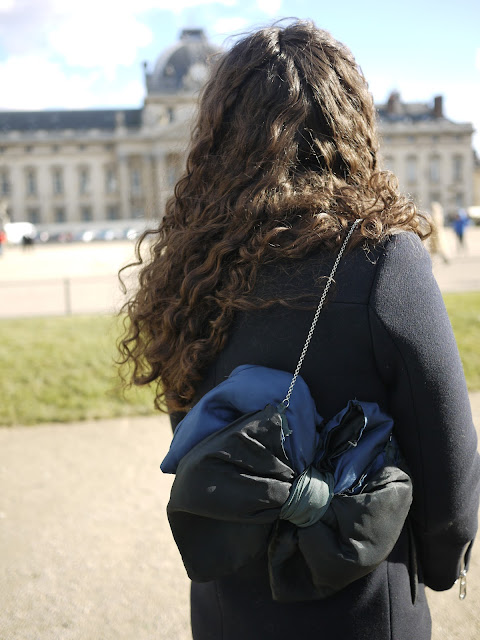
Il suffit de coudre 2 rectangles, un plus grand que l'autre. Par contre il ne faut pas les coudre sur le côté du dessus, car c'est ce qui servira d'ouverture au sac. Je les ai un peu molletonné pour créer cette aspect un peu bombé. Un autre rectangle (le gris sur la photo) servira d'assembler les 2 rectangles (le bleu et le noir) et en le serrant bien (j'ai fait plusieurs tours) cela créera un effet "noeud". Ensuite j'ai cousu une chaîne et attrapant bien les 2 rectangles pour ne pas créer un déséquilibre. j'espère que je suis assez claire...

I don't have a detailed tutorial for this purse that I made a long time ago before having my blog actually...But I will try to explain it.. Don't hesitate if you need more infos.
You need to sew 2 rectangles, one bigger than the other. But don't sew the side on the top, because that's the side which will be the opening of the purse. I quilted it to create this puffy effect. Another rectangle not quilted (the grey on the pic) will be needed to assemble the 2 others rectangles (the blue and the black one). You need to tight it strongly (i have made several turns) because this will made the "Bow effect".
Thenk sew a thin chain by sewing too the 2 big rectangles so that the purse will not be unstable.
I hope I am clear enough...